How To Ink And Paint A Traditional Animation Cel
Supplies you will need:
Acrylic Medium
Pencil
Nib and Ink
Colored Pen
Sketch Paper
Palette Paper or Mixing Cups
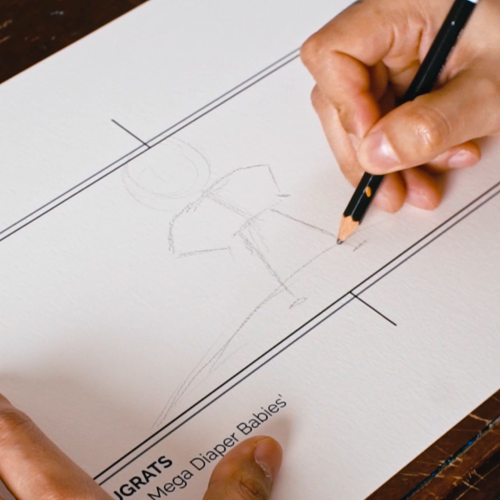
Sketching
Let’s start with the first and most important part of the whole process, sketching out the design. Start off with light pencil marks and slowly build on top of them. Adjust anything that seems off, remember this design will be traced onto the film and you definitely don’t want to second guess anything later in the inking process.
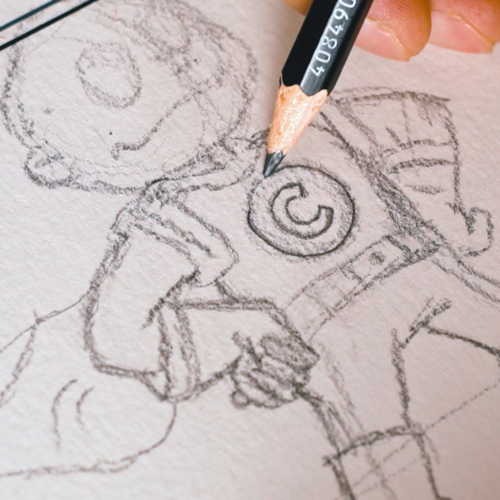
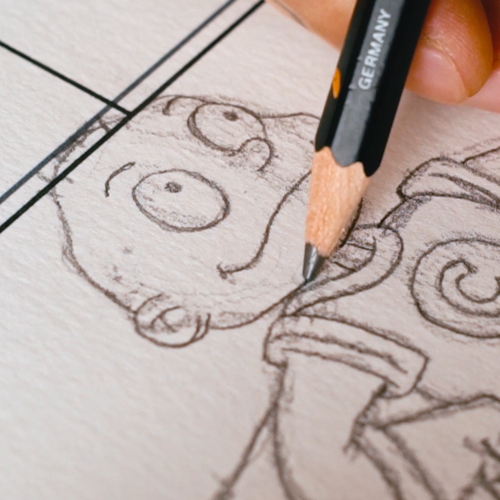
After I’m done with the design I will go over it with a colored pen, any color will do but avoid using black (you will see why later on).

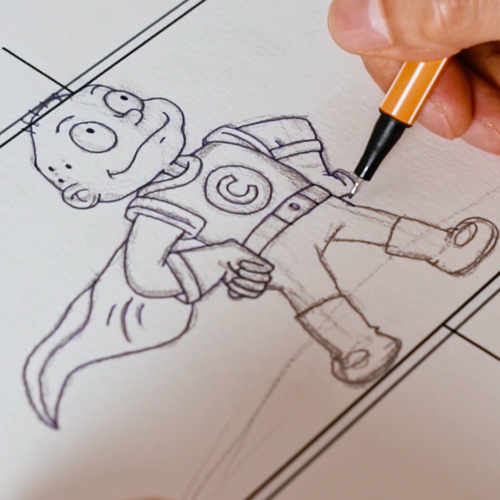
Erase any pencil marks revealing the refined outlines that will be replicated on the clear film.
Inking
My preferred nib for inking is either the Nikko G or Zebra G nib, but it’s important to find nibs that you enjoy using. Also, there are nibs with unique characteristic that can easily create contrast between line strokes.
IT IS VERY IMPORTANT THAT YOU DO NOT TOUCH THE INKING AREA WITH HAND OR FINGERS
Place a piece of paper between the film and your hand when inking.
To get the best lines keep consistent pressure on the nib at all times. Make sure to finish each stroke with one complete movement, this will help you avoid choppy lines. This step requires a lot of practice and a lot of patience so take your time. The colored pen used on the sketch really help to separate the black ink I am laying on top.
After you are done with the inking set it aside to dry…
Painting
Flip the film over for all the painting will be done in the back.
My painting method goes like this: black, white and the most used colors first. Leaving the least used colors for last. When painting white place a colored piece of paper under the film for better accuracy.
Try your best to do the ‘float painting method’ which basically means to have the brush float a hair over the film making the acrylic puddle on top. This method takes A LOT of practice so brush the paint on regularly if you have a difficult time with the float method.
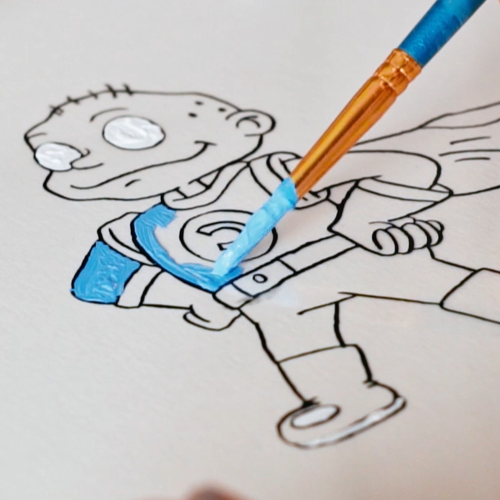

Paint in the colors one at a time and let neighboring colors dry to avoid color from mixing.
Try you best to stay with the lines when coloring.
After every color has been painted check to see if the painting is opaque enough, most times you will need to add a second layer of paint so the background doesn’t show thru later down the line.
After you are happy with the painting portion set it aside to dry…
Background
Traditional backgrounds were painted in a variety of mediums: acrylic, watercolor and gouache. Let the background set the mood of your design but make sure it doesn’t steal any attention from the cel, unless that’s what you are going for.
Make sure the colors you choose for the background do not clash with any character you decide to draw on the cel.
Finished Cel
After the ink and paint have dried you can finally see your finished
It’s so fascinating to know that my favorite animated cartoons were painted by hand frame by frame. Sadly, a lot of cels were either lost or destroyed thru the years. Luckily this art form is kept alive and will forever leave a positive mark in history.
Leave me a comment down below if you have any questions, Thank you so much for reading.